cover-img

GitHub Actions 101: Deep Dive into Workflow Attributes

Beginner Series to Automating your Workflow with GitHub Actions! Part 2: Useful Attributes to Know

15 December, 2022

3

3

0

Hello and welcome to Part 2 of the GitHub Actions series. A series where we will walk through everything you need to know about GitHub Actions, from the basics to creating your own customized workflow.
If you have missed Part 1, please read it here before proceeding to Part 2.
In this part, let's dive deeper into some attributes and useful things you need to know to customize a good workflow.

Job dependencies

Recap: Each workflow must have 1 job, each job has a unique identifier, they run in parallel by default.

As discussed in the previous part of this series, jobs are executed in parallel by default. In the example below, job1 and job2 will be run simultaneously.
However, using theneeds attribute, we can ensure certain jobs to run based on another job.
Let's take a look at an example:
As seen in the example, job1 must complete successfully before job2 can run. This means that if job1 fails, then job2 would not run. Furthermore, since job3 depends on job1 and job2, it will not run if both jobs fail.

Sequential Jobs Regardless of Success

What if you need a workflow that runs jobs in a certain order but do not require job1 to be successful to run job2?
We can pass a conditional with the if attribute. The value will be always() which tells job2 to always run after job1, despite the result of its run.

Conditionals

Since we discussed if earlier, let's take a closer look at conditionals in GitHub Actions. These can be very useful when trying to build a custom workflow with different conditions.
As you may have recalled from Part 1 of this series, the top-most attribute we include in our workflow is the on attribute. This attribute must be included in any workflow because it indicates what event will trigger the workflow to run.
Most common events you will see are push, pull_request and release. For example:
Notice that I use the branches attribute as conditionals, where the workflow will run if a push is on the master branch; or where the workflow will run if a pull_request is on the develop branch. Hence, the workflow will run only when these certain conditions are met.
Instead of branches, we can also use branches-ignore to exclude certain branches from the event trigger.

Note: You cannot use branches and branches-ignore under the same event of a workflow (YAML) file. Also applies to tags and tags-ignore attributes.

Environment Variables

Most of you would be familiar with this term. Environment variables refer to dynamic key-value pairs that are stored in memory on the virtual environment that the workflow is run on.
Some key points to note about environment variables:

They are case-sensitive

They can be set in the workflow, jobs or steps

They are injected and read as the job runs, before commands are called
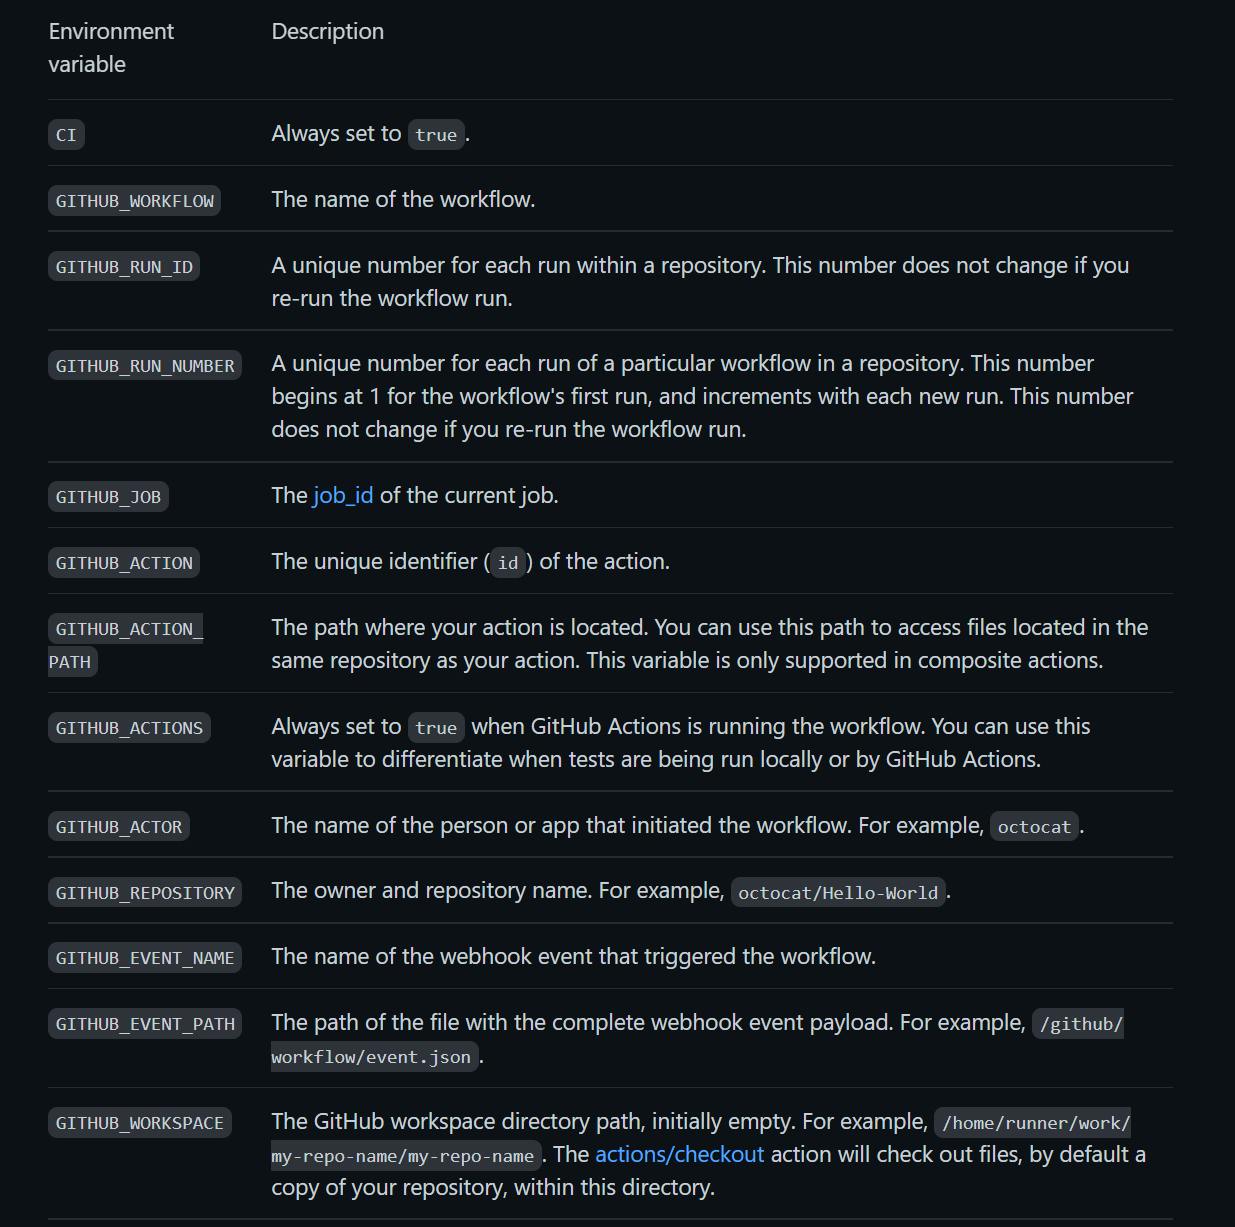
GitHub has some default environment variables, which are recommended to use to access the file system and run across any runner environment. Here are some of them:
img

Create custom variables

Environment variables other than ones provided by default can be created in the workflow, jobs or steps using the env attribute.
For example, I have created a simple workflow with custom variables in the 3 different areas below. To access or read the variables, you can either the shell syntax of the runner environment or the YAML syntax.
In my example, the environment of my runner is Ubuntu so in bash, to read the variable is simply $VARIABLE_NAME. For Windows, it would be $env:VARIABLE_NAME.
The YAML syntax would work in any environment. It would be ${{ env.VARIABLE_NAME }}.

Note: Good naming convention to keep environment variables all caps with underscores as spaces.
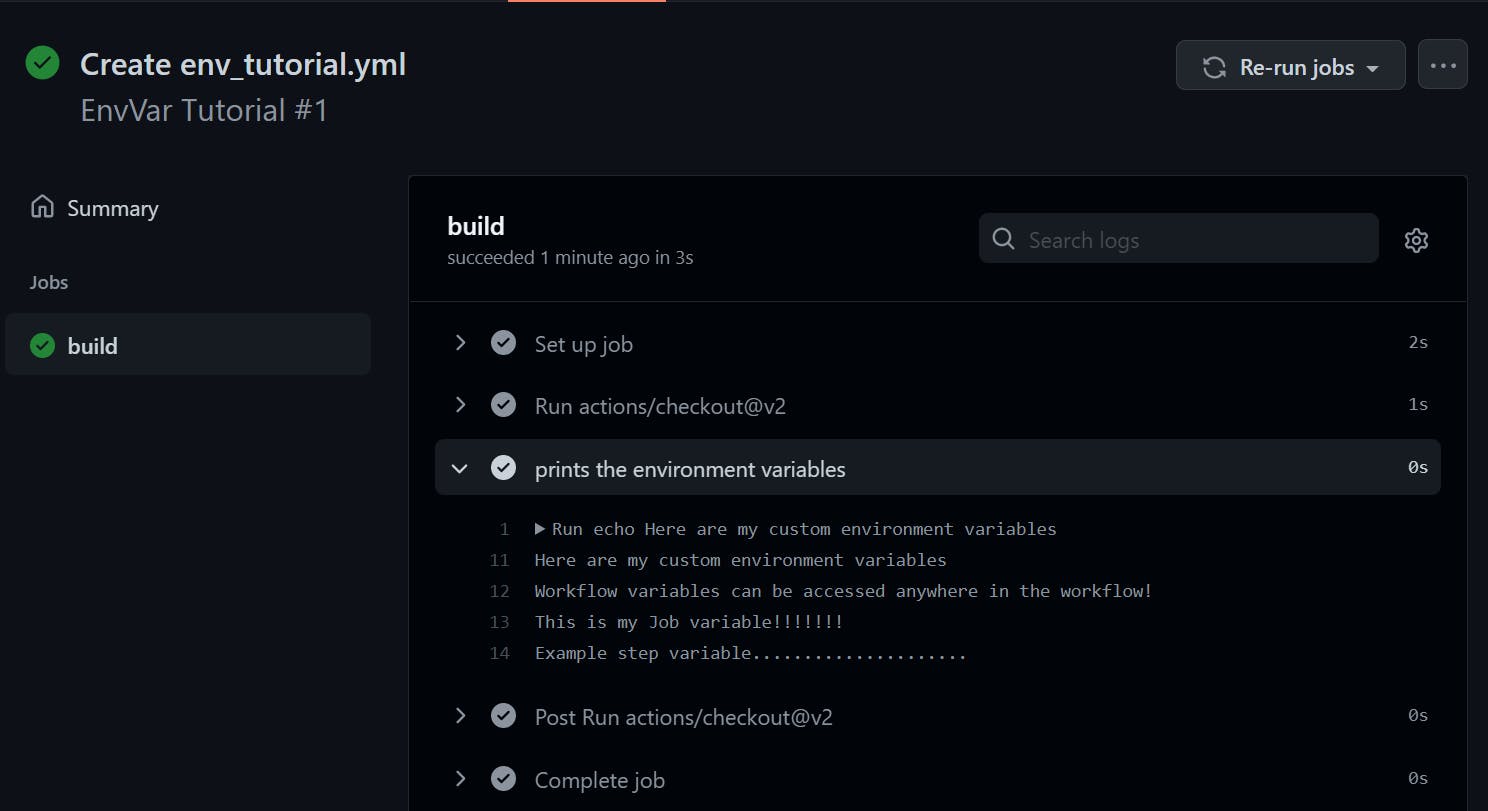
Now let's run this workflow and see the results:
img
It has perfectly printed out our custom variables!

To be Continued

There is still much more to learn about GitHub Actions. Let's stop here for today. Please visit this repo to review what we have built today.
Thanks for reading part 2! I hope it has been a helpful read. Please leave any questions or comments below. Don't forget to like and share the article if it helps you in any way.
Let's meet again in part 3, where we will take a closer look at actions. Feel free to read the provided documentation in the References section below. Cheers!

References

github

devops

automation

githubactions

3

3

0

github

devops

automation

githubactions

Victoria Lo
A nerd in books, tea, games and software.

More Articles

Showwcase is a professional tech network with over 0 users from over 150 countries. We assist tech professionals in showcasing their unique skills through dedicated profiles and connect them with top global companies for career opportunities.

© Copyright 2024. Showcase Creators Inc. All rights reserved.